My husband recently began making fun of me because within a week I produced a new work bag, lunch bag and decided to hunt for the perfect diaper bag to solve all of my organizational dilemmas. In the same week I began insisting on finding an acceptable camera bag after I dropped (and broke the lens) on our $500 camera when it plummeted out of the diaper bag. He thinks that I am obsessed with bags, but he doesn’t realize I am on a mission. A mission to find that perfect bag that will hold everything I need everyday, be light to carry and will magically refill itself when supplies run low. I am on a mission to carry three or less bags out of the house everyday. Is that too much to ask?
You see, when things start to feel out of control in my life it is time for a new bag to reorganize the daily details. Now, I must say that I am not one of those girls that goes out and buys really expensive bags every month. I go for practical and functional. Little does my husband know that I keep pulling out an old laptop bag or pocketbook from the back of the closet. I have a collection that has been building for years for these very moments! Starting over by dumping everything out of a bag and reorganizing it into a new one gives me a sense of control and a new hope that I will find my cell phone faster when it rings or that I will always have a pen and lipstick with me on the road. The action of simple change can be a powerful one.
The newest challenge for me is the diaper bag. It always needs to be refilled! Now matter how much I try to cull it down I seem to need everything that it contains at playdates and drop-offs to babysitters. I feel like I am constantly re-inventorying it, which is the worst when you have been out all day, are tired and you don’t want to think about whether there are enough wipes or diapers for tomorrow. But, if you don’t do it right when you get home, your baby brain and sleep deprivation will render you too dysfunctional to remember as you rush out the door the next morning.
Luckily I have come up with some shortcuts to help organize all of my bags so whether I am walking out the door as Mommy or Professional Organizer everything is ready to go.
1. Avoid bags with too many pockets. When there are too many pockets you simply can’t remember where you put things and you can’t remember you have them. My main concern with a bag is whether it has a compartment right on the outside that will safely hold my cellphone and keys for easy access. The second is that it is large enough to store what I need.
2. Use clear bags or colorful zippered bags to subdivide what is in your work or diaper bag. It makes your larger bags easier to switch out and combine on the run. I always know where my flash drives and computer cords are in my work bag because they are in a colorful zippered pouch. In the diaper bag I follow the lead of my friend Jess and use small zippered clear bags that sheets/pillowcases etc. come in to put toys and extra clothes. It is easy to see what is in the bag it so you can quickly refill what is missing.
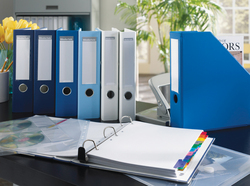
3. I created a station by my door to the garage to hold the bags and daily supplies so they can quickly be refilled (see picture above). Extra diapers, outfits and wipes are all in a bin in the bag area to refill the diaper bag everyday. I also made sure I have slots to stick my bags as the go in and out of the house to ensure I don’t have them laying all over the floor at the end of the day.
4. Get in the habit of sorting and refilling the bags at the end of the day so they are ready to go when you need to walk out the door the next morning. You will thank yourself when you are running late the next day!
5. Be ruthless about what you really need with you on the road. It is easy to be overly prepared with supplies in a work bag, purse or diaper bag. I strive to have the basics. When I find my shoulder hurting from carrying too much it is time to regroup, dump the bag and start from scratch again.
So for all of those men out there who don’t understand women’s obsession with their bags, remember it is more than just having a cute accessory, the bags represent peace, control and regained hope for a simpler life.